How to Fix “TPM Device Not Detected” Error?
The Trusted Platform Module is a PC a security feature that wasn’t widely known before Microsoft’s Windows 11 came out (TPM). It could be something to worry about if you want to build your PC with Windows 11 or upgrade one to an older version of Windows.
What is TPM?
Trusted Platform Module (TPM) is a hardware chip designed to provide secure storage and management of digital keys, credentials, and cryptographic processes. It is used to enhance the security of computing devices and protect against attacks such as tampering, unauthorized access, and data theft. TPM can be used to secure a wide range of applications, including operating systems, firmware, and virtualization platforms.
It’s used by services like BitLocker drive encryption, Windows Hello, and others to securely create and store cryptographic keys and check that the operating system and firmware on your device are what they’re supposed to be and haven’t been changed.
Usually, it’s a separate chip on the motherboard. However, the TPM 2.0 standard lets companies like Intel or AMD build the TPM capability into their chipsets, so they don’t need a separate chip.
TPM has been around for over 20 years and has been a part of PCs since about 2005. In 2016, TPM version 2.0, which is the current version as of this writing, became standard on all new PCs.
What Causes the Error “TPM Device not Detected”?
Before we talk about how to fix it, let’s look at why a computer can’t find the TPM chip. The error message “TPM Device not Detected” can be caused by several factors, including:
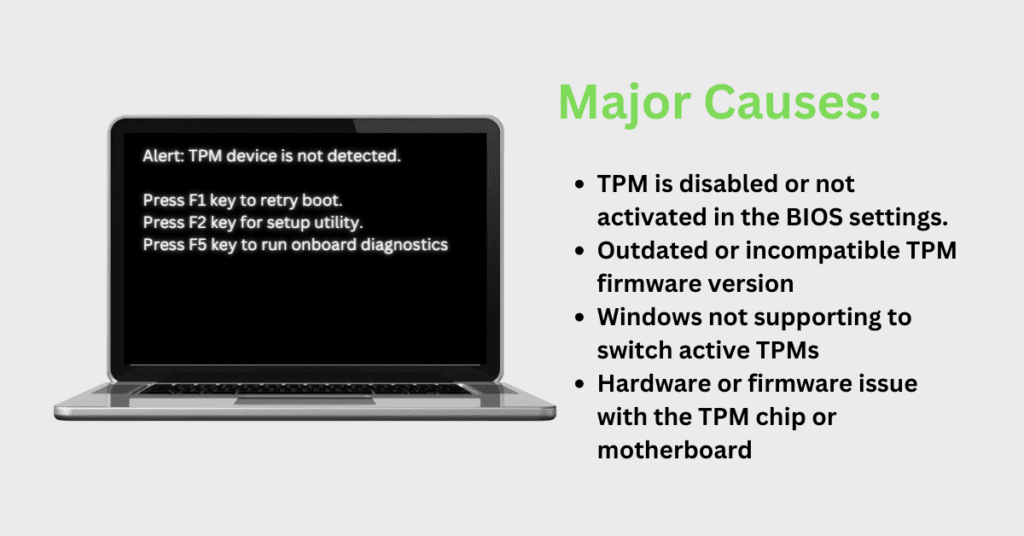
- TPM is disabled or not activated in the BIOS settings.
- The TPM chip is not physically installed in the device or is not properly connected.
- The device has an outdated or incompatible TPM firmware version.
- Windows not supporting to switch active TPMs in UEFI settings.
- There is a hardware or firmware issue with the TPM chip or motherboard
- The TPM chip is being used by another application or is in an error state.
Can I Install a TPM on My Computer?
If you built your desktop PC in the last few years and are comfortable fiddling with hardware and software security settings in the BIOS, you can probably add a discrete TPM 2.0 chip to your motherboard. Many motherboards have a group of “TPM”-labeled header pins. ExtremeTech says you can get a TPM module for some motherboard models for less than $50.
But you can’t just buy a TPM 2.0 module add-on and plug it into the header. Even if you have a hardware TPM in your home-built computer, the Windows operating system won’t be able to see it unless it’s set up correctly in the BIOS. This process is very different depending on your motherboard and CPU. The guide linked above has more information and links to instructions from some of the most popular PC makers.
And if you’re one of the many people who spent a lot of money years ago to build a top-of-the-line gaming PC with a motherboard or CPU that doesn’t have TPM capabilities or can’t add them, your system may not be able to run Windows 11, but it may still work for years. Some PCs without TPM on the motherboard might be able to use a firmware-based TPM 2.0 solution, but putting one in yourself will almost certainly take some trial and error.
How to Fix TPM Device is not Detected Issue?
When a TPM isn’t found, we can’t turn on Bitlocker, but we can still click “Continue” and boot the system normally. Since all of Bitlocker’s passwords and encryption are stored in the TPM chip, we won’t be able to get to them if the system can’t find the chip.
Because of this problem, users can’t upgrade to Windows 11, which is another problem. We know that TPM 2.0 is one of the requirements for upgrading to Windows 11. It is very important to fix the TPM and not detected a problem on your computer to keep it safe. Here are some ideas for what you can do.
Solution 1: Take away the power source
Sometimes, a problem with how much power is used can cause the Trusted Platform Module to stop working for no clear reason. This problem might be fixed with a simple restart, but the motherboard capacitor always has some charge left in it, so the problem will still be there even after a restart.
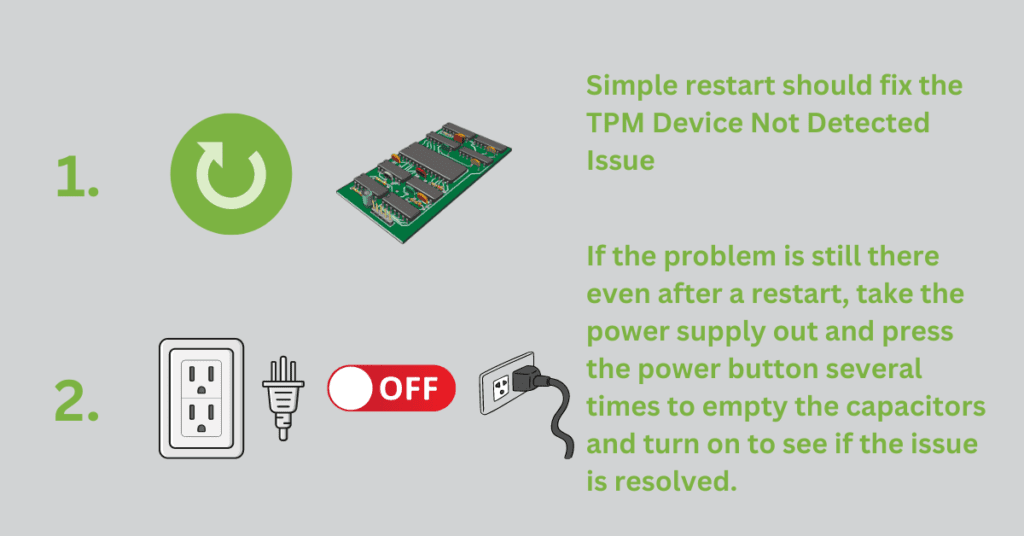
So, it is best to completely turn off the power source and drain all the capacitors. Press the Power button five or six times to empty the capacitors after you take the power supply out of the wall outlet.
If you’re using a laptop, you should take out the battery and press the power button several times to empty the capacitors.
When you’re done, plug the computer back in and turn it back on. The TPM chip should be found by the system. If not, some of the ideas below might work for you.
Solution 2: Enable TPM from BIOS
The steps to enable TPM from BIOS may vary depending on the computer’s manufacturer and model, but in general, the following steps should work:
- Restart your computer and enter the BIOS setup by pressing the appropriate key during the boot process (the key varies depending on the manufacturer and model of your computer).
- Once you are in the BIOS setup, look for a section called Security or Advanced Security.
- In the Security section, look for a subsection called Trusted Computing or TPM Security.
- If the TPM is disabled, change the setting to enabled.
- Save your changes and exit the BIOS setup.
- Restart your computer and enter the operating system. Your TPM should now be enabled and ready for use.
If you are not sure how to enable TPM in your computer’s BIOS, you can check the manufacturer’s website or user manual for specific instructions on how to do so.
Solution 3: Update the firmware on your TPM module
The latest version of your TPM’s firmware can fix bugs, add TPM features, bring it up to date so it works well with newer versions of your operating system, or make it compatible with the latest Windows drives.
In most cases, the firmware on a TPM is updated automatically through Windows Update or the manufacturer’s firmware update utility. If an update is available, it will be downloaded and installed automatically, provided that the device is connected to the internet and the update settings are configured to allow automatic updates.
If you do need to manually update the firmware on a TPM, it is important to carefully follow the instructions provided by the TPM manufacturer. If you are not comfortable or familiar with the process of updating the firmware on your TPM, it’s best to seek the assistance of a professional or the manufacturer’s customer support team to ensure that the process is carried out correctly and safely.
Intel realeased the TPM Firmware update for Intel® NUC Kits NUC5i5MYHE and Intel® NUC Boards NUC5i5MYBE. This update addresses the recent Intel Security Advisory INTEL-SA-00104, which highlighted a vulnerability in the Trusted Platform Module (TPM). The company encourages all affected users to download and install the update as soon as possible to ensure maximum security.
Solution 4: Reset BIOS to factory settings
Well, some users also get the error after updating the BIOS firmware on their system. If you also get the error after updating BIOS, likely, the update is not compatible with your system.
So, in this case, you might be able to fix the problem by putting the BIOS back to the way it was before.
The steps to reset BIOS to factory settings may vary depending on the motherboard and BIOS version, but in general, you can follow these steps:
- Turn off your computer, unplug it from the power source, and wait for 10-15 minutes.
- Plug in the power cable and turn on the computer.
- Press the key indicated on the screen to enter the BIOS setup (usually F2, F10, or Delete).
- Look for an option to reset the BIOS settings to the factory defaults, usually found in the “Exit” or “Reset” menu.
- Save the changes and exit the BIOS setup
- After the reset, the BIOS settings will be restored to their original state.
And when you’re done, turn your device back on to see if the problem is fixed.
Solution 5: Select and Use Only One TPM at a Time
It is possible for certain computer systems to contain more than one Trusted Platform Module (TPM), and some systems may allow for the active TPM to be toggled in the Unified Extensible Firmware Interface (UEFI) settings. However, it’s important to note that Windows does not support this behavior, and switching TPMs can cause Windows to not properly detect or interact with the new TPM. To prevent this issue, it is recommended that only one TPM is selected to be used, and the selection isn’t changed.
In situations where it is necessary to switch TPMs, it is advisable to toggle to the new TPM and clear it, followed by a reinstallation of Windows. This ensures that Windows is properly configured to work with the new TPM and that any issues with BitLocker or other security measures are avoided. You can also check the documentation on Troubleshooting the TPM Initialization by Microsoft.
Solution 6: Clear all the TPM Keys
The Windows Defender Security Center application can be used to clear the TPM as a step for troubleshooting or to prepare for a clean installation of a new operating system. This ensures that the new operating system can fully utilize any TPM-based functionality that it includes, such as attestation.
However, clearing the TPM causes it to be reset to an unowned state. After the TPM is cleared, the Windows operating system will automatically re-initialize it and take ownership again. But, it’s important to keep in mind that clearing the TPM can result in the loss of any keys created and associated with it. This includes data that is protected or encrypted by those keys, such as virtual smart cards or sign-in PINs.
To protect against such loss, it is necessary to have a backup and recovery method for any data that is protected or encrypted by the TPM. This ensures that users don’t lose their data in case of any unexpected loss due to clearing the TPM. Therefore, before clearing the TPM, it’s important to review all precautions and back up any necessary data.
What to Do If TPM 2.0 Cannot Be Found on Windows?
In order for a TPM 2.0 chip to be properly detected by the Windows operating system, it is important to check that the computer hardware includes a Unified Extensible Firmware Interface (UEFI) that meets the Trusted Computing Group’s standards for security. The UEFI settings should also be checked to ensure that the TPM is not disabled or hidden from the operating system. If any issues are found, adjustments can be made to the UEFI settings to enable the TPM and ensure that it is detected by the operating system.
Conclusion
One of the most common problems people have when trying to upgrade to Windows 11 is that the TPM device is not found. Still, it’s good to have a TPM that works for many reasons.
Among the solutions mentioned, you can turn on TPM from the BIOS, update the TPM driver, unplug the battery, and finally update the BIOS. But if it’s still there every time you boot, you might want to talk to support.